Building a custom wireless ergonomic keyboard

This post is a bit off topic compared to my usual posts. I have a wide varity of interests and like to share my experiences to anything tech-related on this blog.
I'm a bit of a keyboard enthusiast. It started about four years ago when a coworker was using a 60% keyboard (it has 60% of the keys of a full-size keyboard). I was amazed, to say the least. I bought the same keyboard for myself and immediately fell in love.
Eventually, I found myself using the Zsa Moonlander, which is a 60% split ergonomic keyboard but still wanted more. At this point, I got into the world of DIY keyboards. My first and only build at the moment is the Dactyl Manuform 4x5. It's a wireless split ergonomic 40% keyboard.
The keyboard
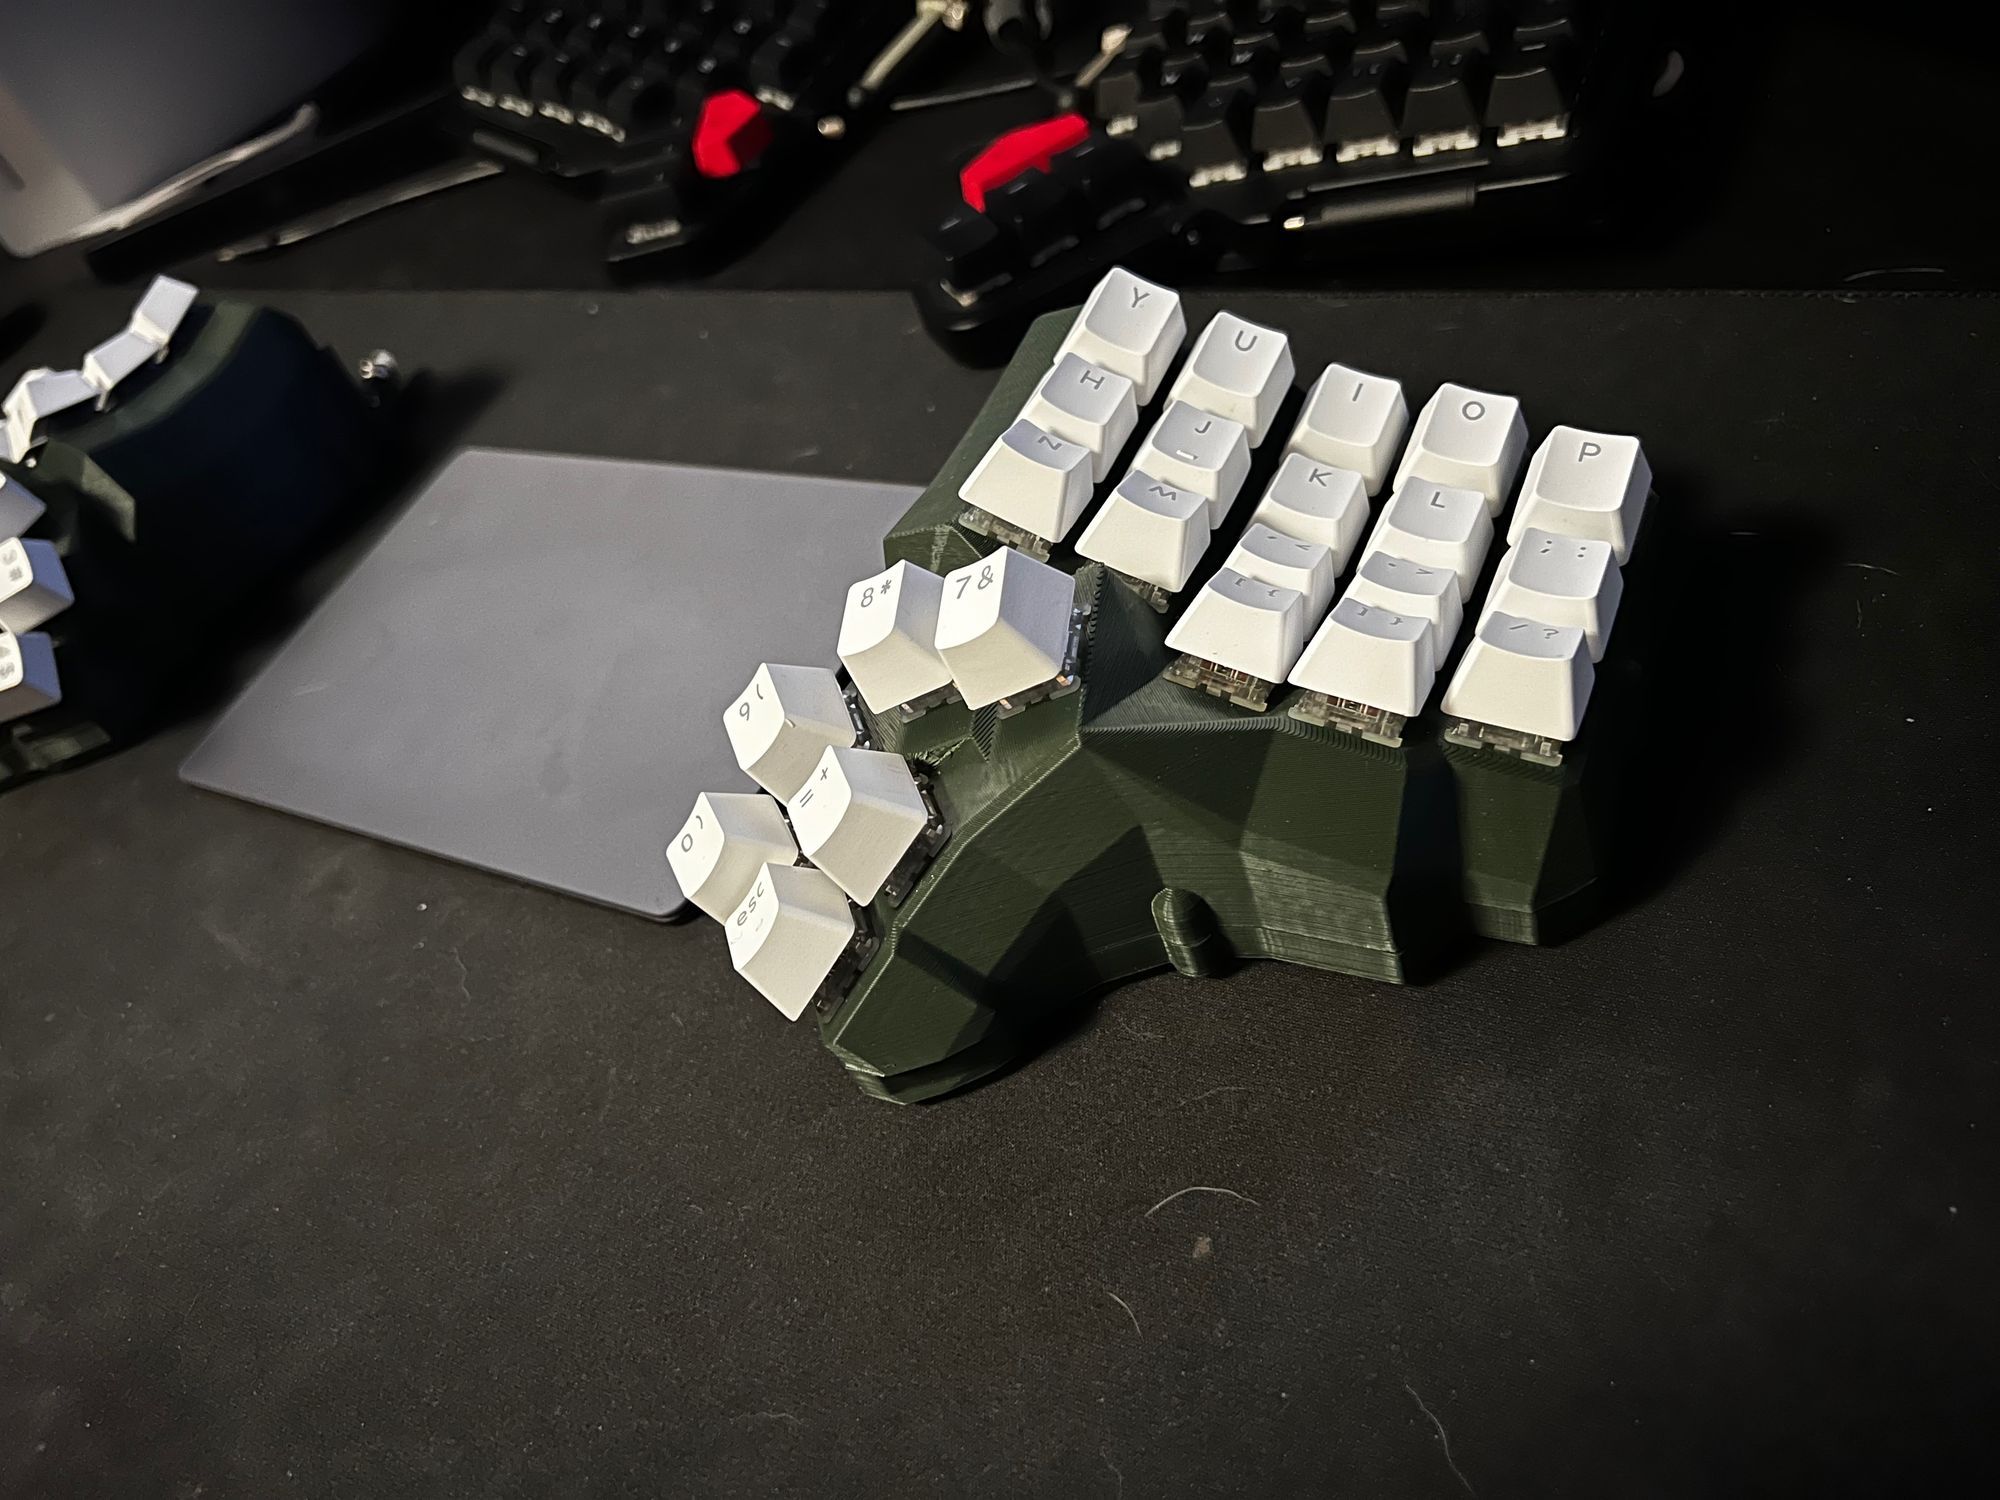
The keyboard itself is split into two parts with a curved layout for increased ergonomics. It has a total of 46 keys, 23 on each half, with a thumb cluster containing a total of 12 keys, 6 on each half. A thumb cluster is a group of keys meant to be pressed by the thumb.
The case and bottom plate were 3D printed. Some prefer to use a bottom plate of metal to add to the weight, I'm using quite large batteries which adds enough weight to my liking. It all boils down to preference, and the beauty of DIY keyboards is that you can do whatever you want.
Wireless connectivity
The most important thing for me in building a custom keyboard was having it wireless. There is specifically one microcontroller that supports wireless first using either ZMK or Bluebird firmware. It's the Nice!Nano controller which is pro-micro-based android controller. This is the brain of the keyboard, recording keypresses and translating them before sending them to the computer. For a split keyboard, you need one controller per half. Both controllers communicate together seamlessly with no noticeable lag.
Parts
Prior to building the keyboard, a list of parts is needed. The dactyl manuform is a hardwired keyboard due to its curvature. For flat keyboards, you might instead choose to build on a PCB. There are also per-key PCBs that can be used, I just wanted to build the cheapest possible board for myself. Parts needed for the dactyl build:
- 46 diodes (Used to wire the switches together. Good idea to have a few spare if you snap them)
- 46 key switches - Also a good idea to have a few spares, I broke a couple of switches building mine
- 46 Keycaps - There is a variety of available keycaps, double-check that the keycaps fit the switches
- 2x Nice!Nano - The controller for the keyboard
- 2x Li batteries - Apparently 100 mAh is sufficient, I'm using 1000 mAh and the battery life is great. It is a bit larger and requires a bigger case. If you want RGB the battery drains significantly faster.
- Dupont wires - Connect the key switches to the controller
Building
The building in my case was really split into three parts. It was not particularly difficult once I understood how it should be done, all done in about a weekend granted you have all the parts available
The case
I 3D printed the case as I have a 3D printer at home. I did not find a model for a bottom plate with raised edges, so I took an existing one and extruded walls from the flat design.
Each side of the keyboard took about 18 hours to finish, and the bottom plate took about 2 and a half hours.
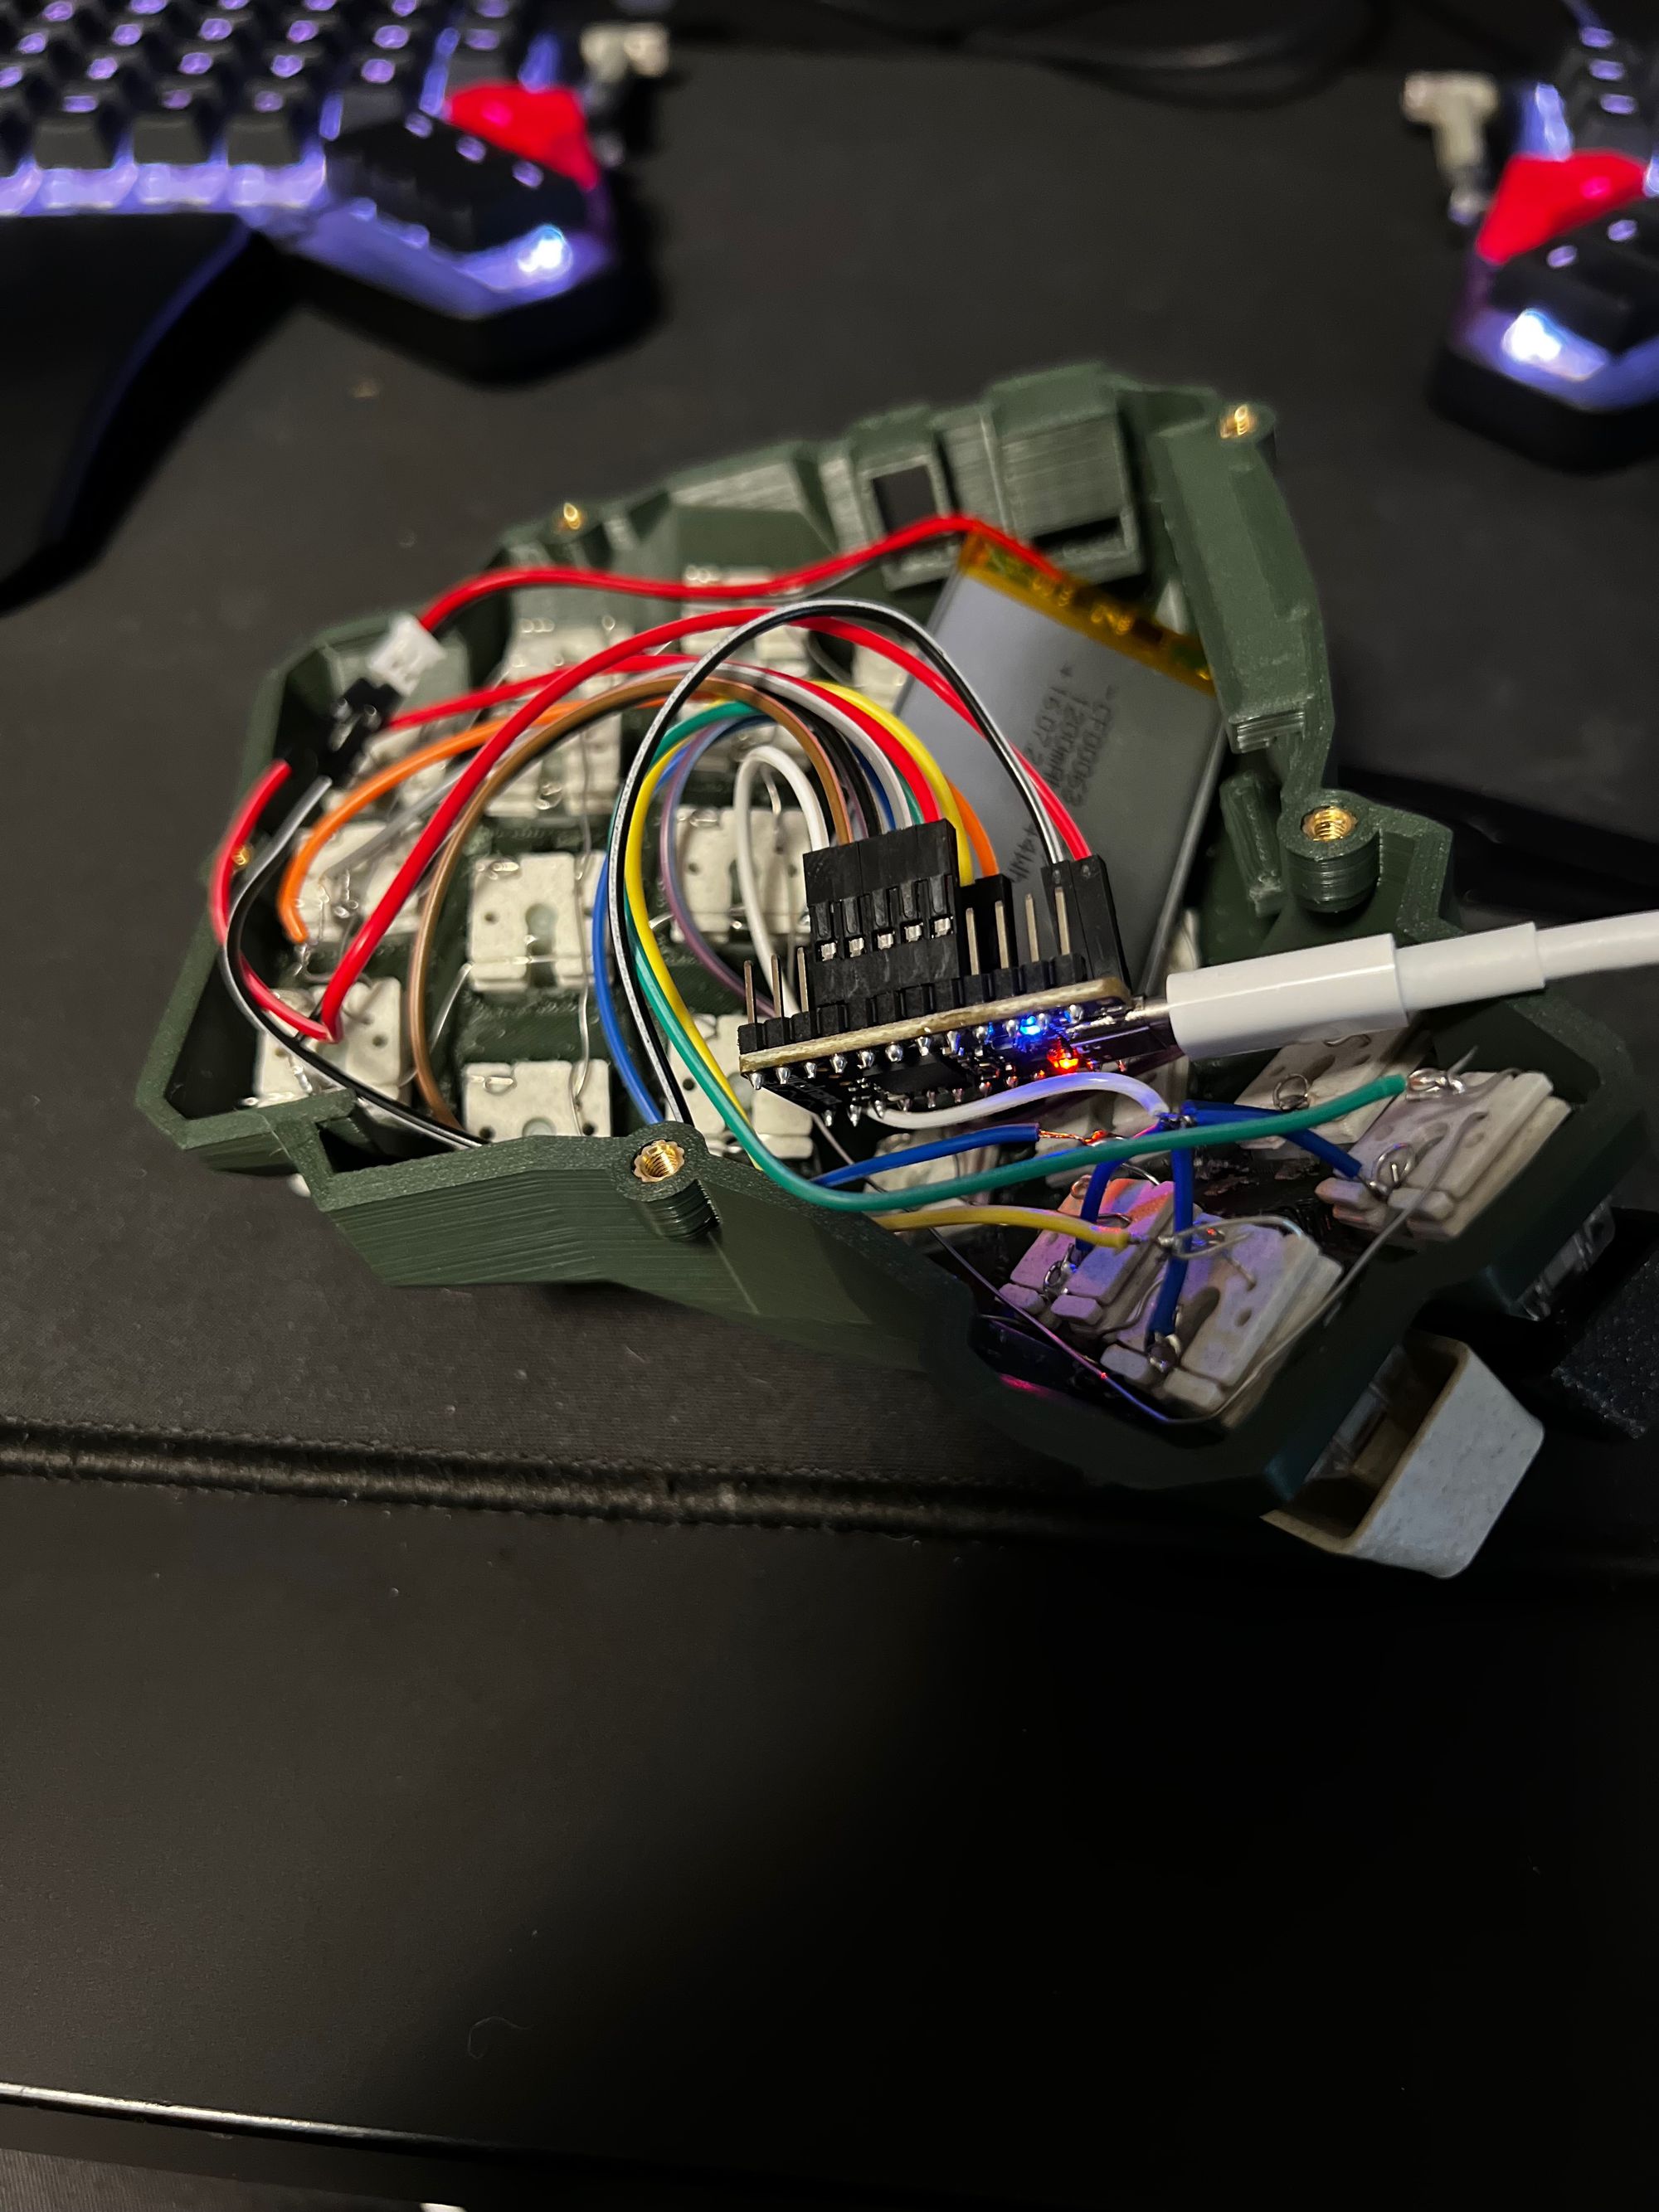
Wiring
I had the microcontrollers on order, and while I was waiting I decided to wire the board. Keyboards are wired in a matrix, meaning that each row of switches is wired together, and each column is wired together. Finally, you wire all the rows and all the columns to the Nice!Nano controller. There are a bunch of resources on how exactly to do the wiring with the diodes and switches so I won't go into detail about that, I would like to highlight the challenges I faced and how I solved them.
The first challenge in wiring the keyboard was uncertainty. I was worried that order and direction mattered, but in reality, everything can be fixed in the firmware. As long as the diodes are oriented correctly, and the rows do not touch the columns, you'll be fine.
Firmware
Firmware was by far the most challenging, largely due to it being wireless and me being located in Norway, in need of special characters. I opted for the ZMK firmware as it promised good battery life and I'd prefer not to charge my keyboard every week.
Flashing the firmware onto the Nice!Nano is extremely simple, building the firmware, not so much. This is largely due to the Dactyl Manuform not being a "supported" keyboard and having to be built from the ground up. This is most likely due to the wide variety of configurations you can build the keyboard in.
Following ZMKs getting started guide helps you set up the GitHub repository and initializes some files. You're asked what type of keyboard you're building, choose anything at all, I chose the Corne as this is also a 40% split keyboard (Setup for split keyboards is slightly different from normal boards). I tried to change the configuration simply by editing the keymap to correspond to my layout and changing the name from 'corne' to 'dactyl'. No luck.
The error message can be rather cryptic and hard to decode, and the process is slow as the firmware is built by GitHub actions every time. (build time is a couple of minutes). I cloned the official ZMK repo and added dactyl as a board, and built it locally using docker dev containers. This way I was certain that my OS (macos) was not causing any issues. Eventually, the firmware was built successfully, and flashing to the controller was no issue, but the keyboard did not work. To this day I'm not sure what was wrong as there are multiple moving parts.
The solution
In one word: patience. I edited and rebuilt the firmware over 100 times the first few days, desperate for it to finally work. Eventually, it all boiled down to a reversed column order and typos in the keymap.
Super excited that the keyboard was finally working I set out to configure the keymap to my liking. Going from a 60% keyboard to 40% gave me something to think about optimizing the layout to efficiently give me access to all the keys and symbols I need. Everything was configured, but I forgot one thing, my dear special characters æøå. After a bit of Googling, I figured I had two choices, using Unicode or manually mapping all the inputs to a Norwegian layout. The latter seemed tedious and I could not be bothered at the time, I just wanted this to work.
With some effort trying to make Unicode work, I came to the conclusion that macOS does not support Unicode anymore. It also involved changing the input source to Unicode which was not a viable option (this completely changes the entire layout).
Thankfully, a bright mind from the ZMK community made a script to generate keycode mappings for your respective locale which was a huge time saver. Some of the keycodes were incorrect, but it was minimal effort to fix these.
A final note
Building my own keyboard was a fun experience. I got to take a closer look into how keyboards work and how firmware is built. I'm also left with an ergonomic wireless keyboard which I absolutely love. A week of intensive use drained only 10% of the battery, it's safe to say the battery will last a while.
If you're stuck on the same issues as me, feel free to contact me about the configuration. I'll try to remember to make the repository public and link it here.